
In this lesson we will create a Free Membership. We will use a web form.
The web form set up is very similar to the order form set up.
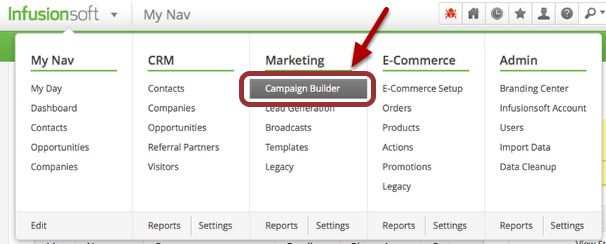
1. Hover over the Infusionsoft logo > Marketing > Campaign Builder
2. Select the green Add a Campaign button

3. Name your campaign
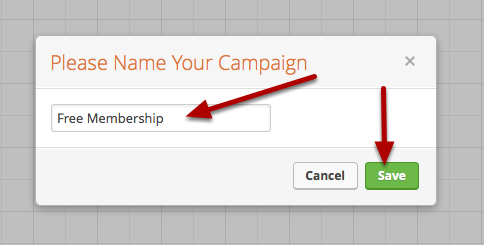
4. Click Save
5. Drag over the ‘Sign up for newsletter button’
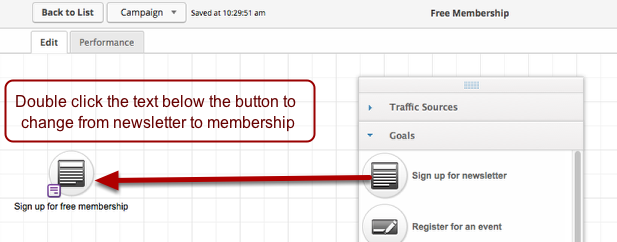
6. Double click the ‘Sign up‘ button to open the configuration box
7. Add the fields you need to the web form
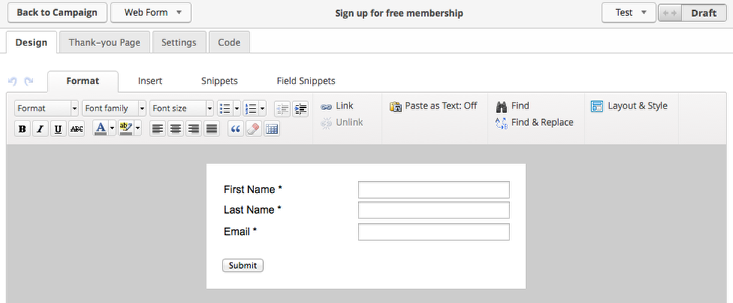
You can add additional fields, radio buttons, images, colors.
8. Set up the thank you page
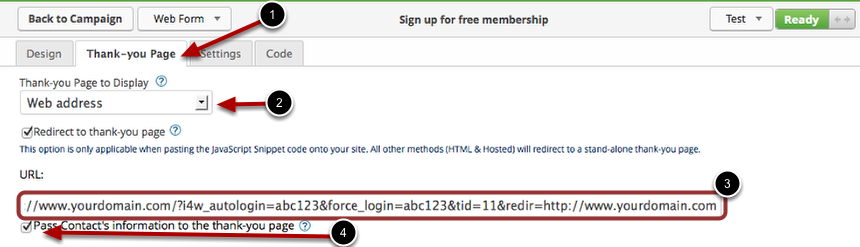
- Go the the “Thank-you Page tab”
- Click the drop down arrow to select Web address
- Type in the sample url below
- Change the yourdomain to your domain name
- Replace abc123 with the first 6 characters of your API key
- Change the 111 to the actual id of your free membership tag Only ONE tag id can be used!
- Check the box to “Pass Contact’s information to the thank-you page”
Sample URL:
http://www.yourdomain.com/?i4w_autologin=abc123&force_login=abc123&tid=111&redir=http://www.yourdomain.com
http://www.yourdomain.com/?i4w_autologin=abc123&force_login=abc123&tid=111&redir=http://www.yourdomain.com
9. Set up the Notification Email
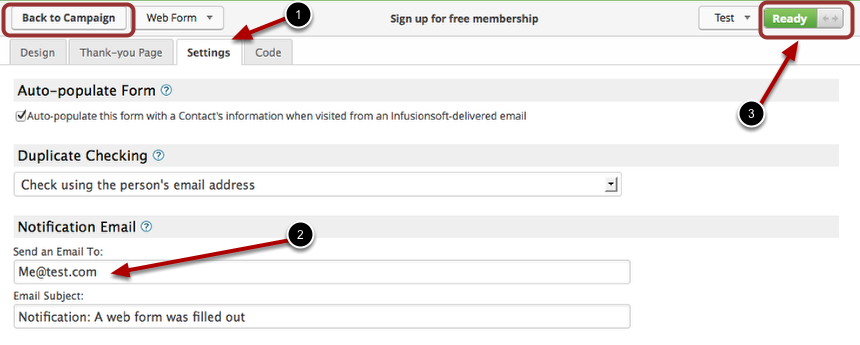
- Click the settings tab
- Add your email address if you want a notification sent to you when a form is filled out.
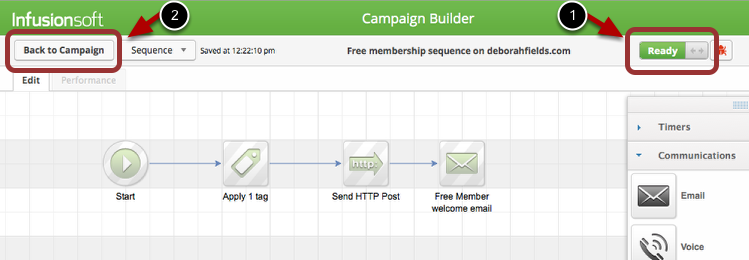
10. Click READY to mark the form ready.
11. Click Back to Campaign
12. Click Publish
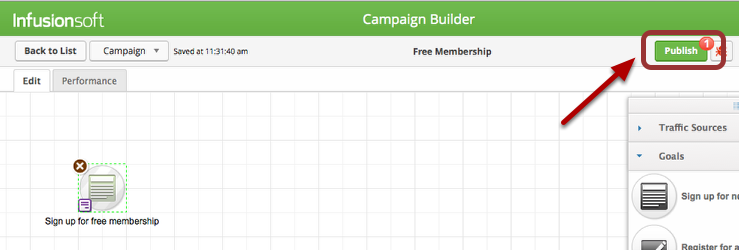
Be sure to click Publish before you get the code for the web form.
13. Go back to the web form
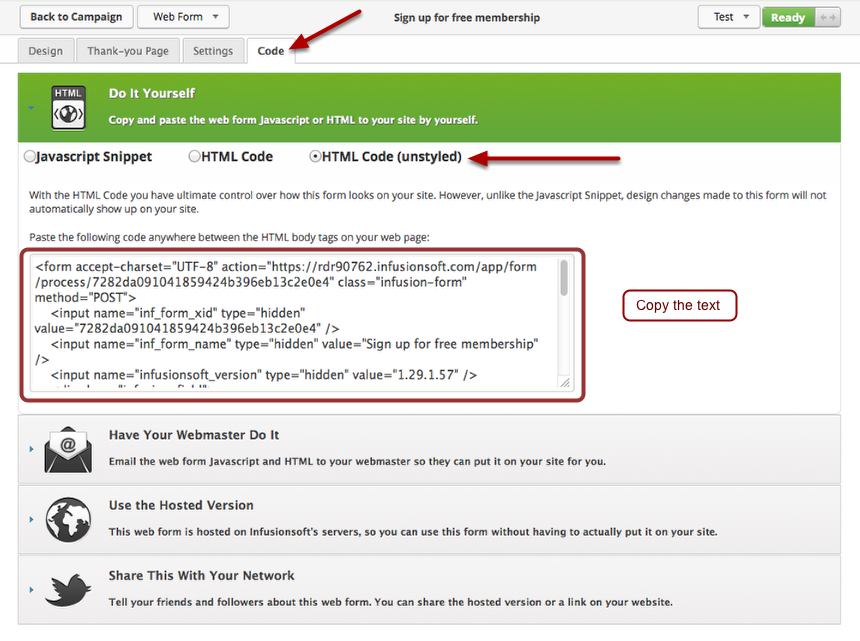
- Double click the ‘Sign up‘ button to open the web form again
- Click the Code tab
- Choose the code you prefer. I personally like the html code (unstyled)
14. Copy the text and insert it in your WordPress page.
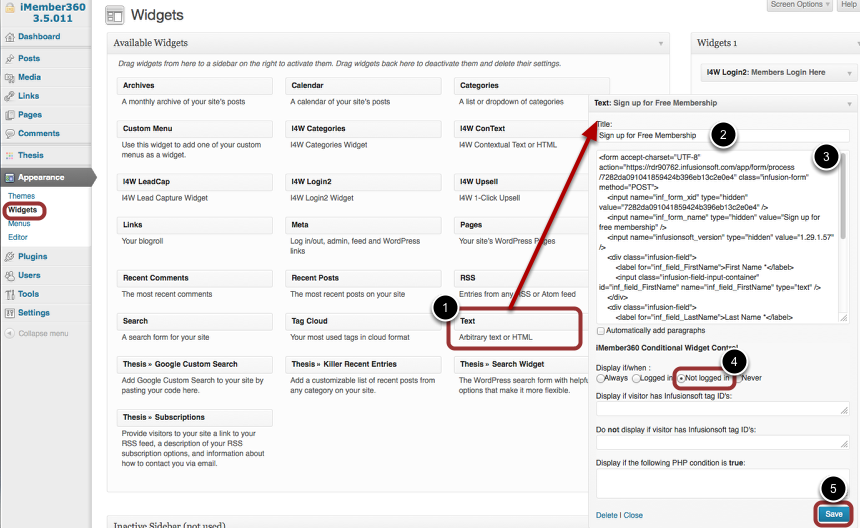
For demonstration purposes, I selected to put it into a widget.
- Drag the Text widget to the widget area
- Add a title
- Paste your code into the body area.
- I selected to Display if/when: the member was not logged in.
- Save
15. Go back to Infusionsoft
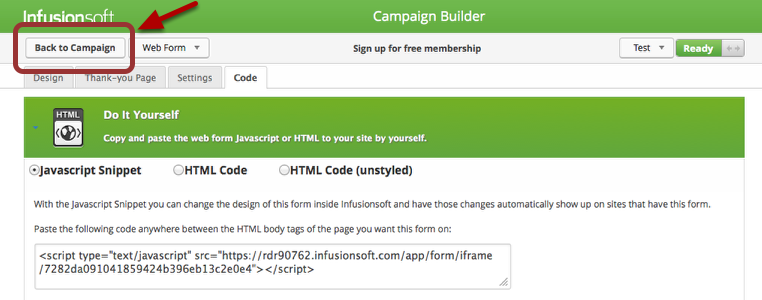
16. Click Back to Campaign
17. Create the Free Membership Sequence
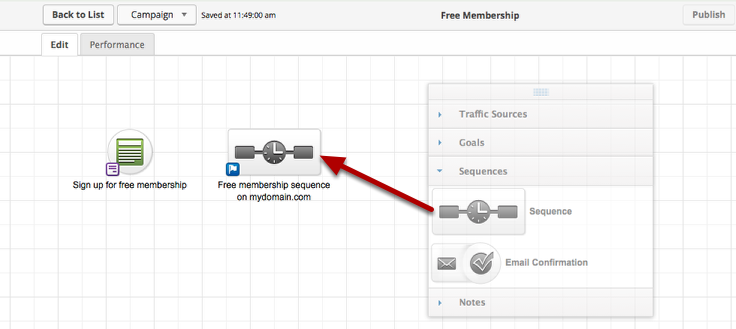
18. Drag a Sequence button out
- Add a name and description
- Double click the sequence button to open the sequence
19. Set up the sequence
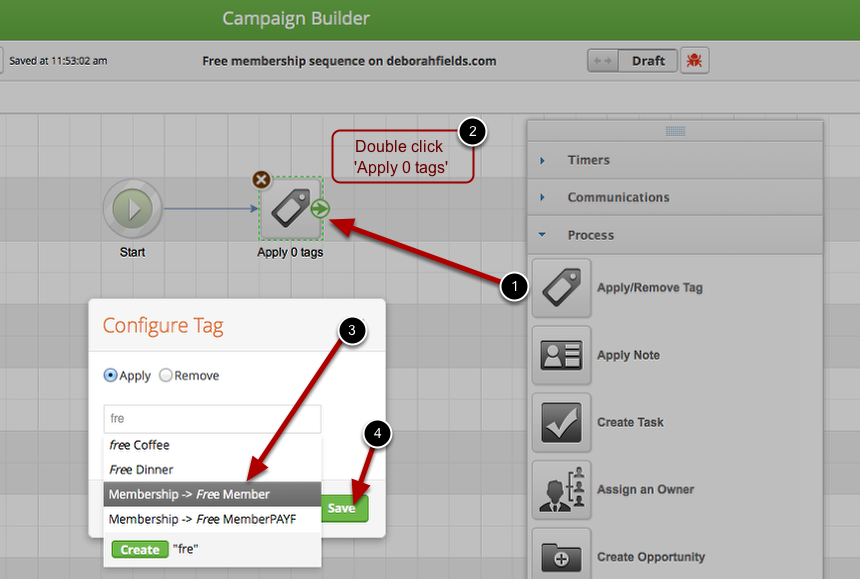
- Drag out the ‘Apply/Remove Tag’ button
- Double click the ‘Apply 0 tags‘ button
- Start typing the name of your free membership, it will appear as you type. Select it
- Click Save
20. Create Password
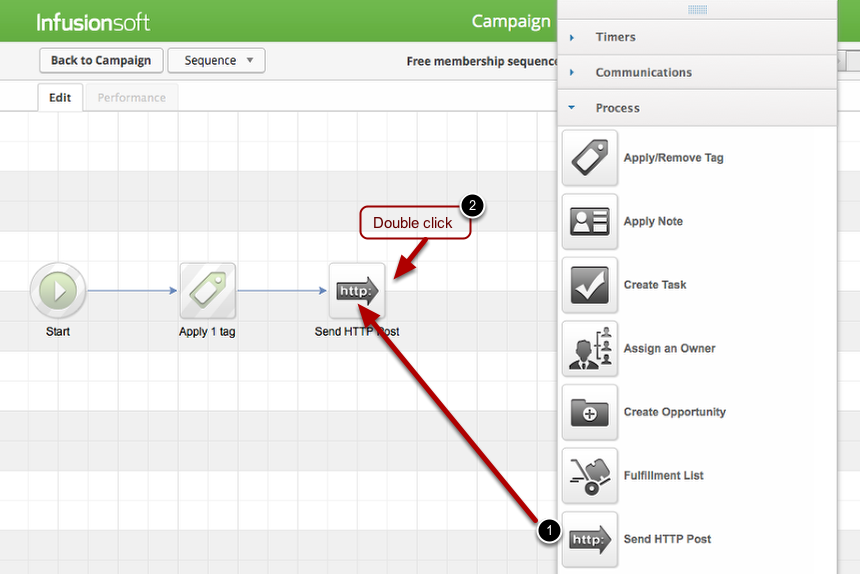
- Drag ‘Send HTTP Post’ button out
- Double click the Send HTTP Post button.
21. Create HTTP Post
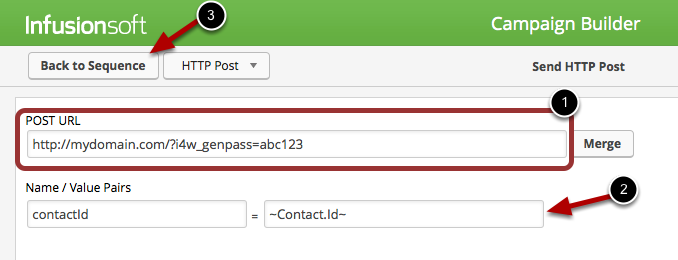
- Type: http://mydomain.com/?i4w_genpass=abc123
- Change mydomain to your domain name
- Change abc123 to the first 6 characters of your API key
- Be sure the Name/Value Pairs is filled in.
- Click Back to Sequence
22. Create Welcome Email
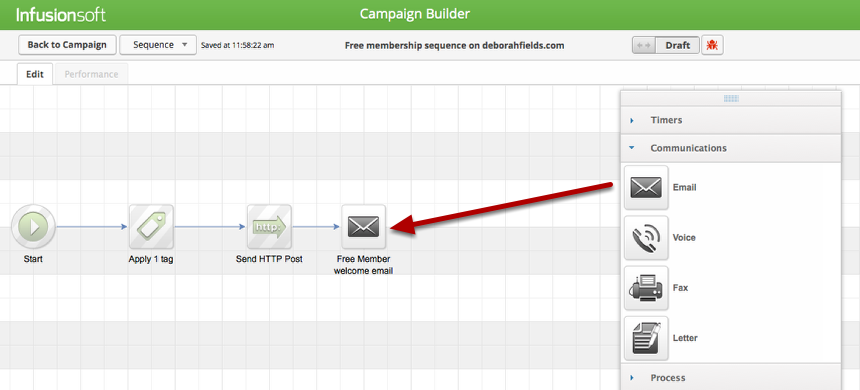
- Open the Communications area;
- Drag out the Email button, double click the text underneath to change it
- Double click the Email button to open it
23. Type Welcome Email
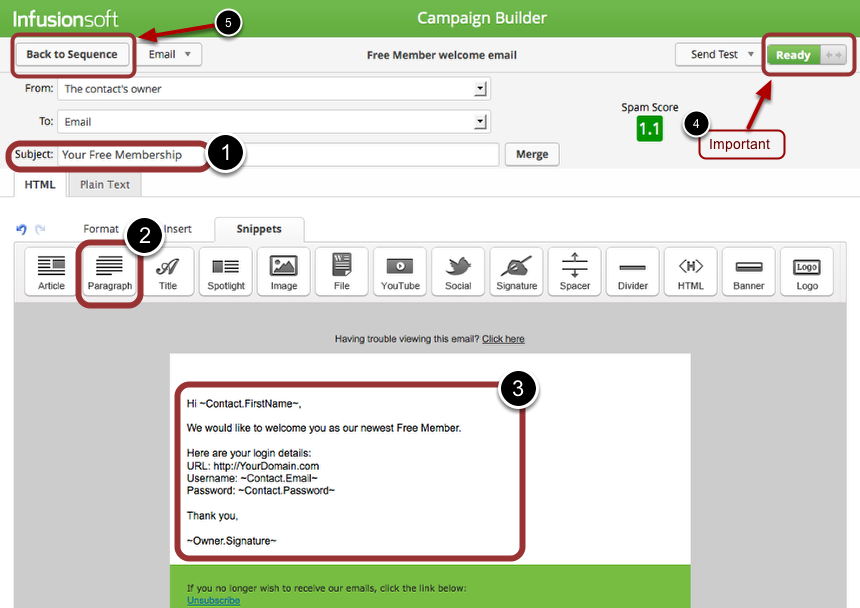
- Type in a subject for your email
- I deleted the header and the article snippet. I dragged out the paragraph snippet and added the text below.
- Sample Text
Hi ~Contact.FirstName~,
We would like to welcome you as our newest Silver member.
Here are your login details:
URL: http://YourDomain.com
Username: ~Contact.Email~
Password: ~Contact.Password~
Thank you,
~Owner.Signature~
24. Click READY
25. Click Back to Sequence
26. Change the draft button to READY.
27. Click Back to Campaign
28. Click Publish
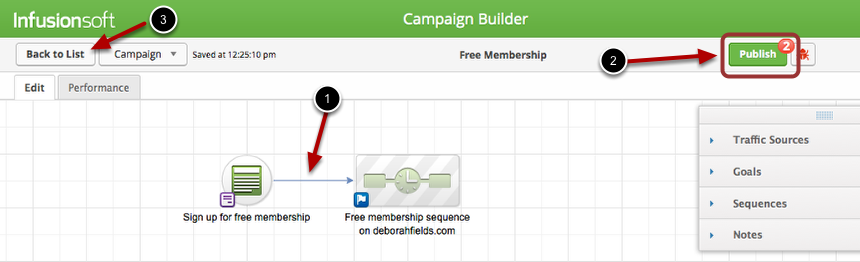
Make sure there is an arrow from the web form to the sequence
29. Click Back to List
30. Test
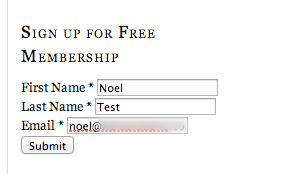
- Fill out your Free Membership form on your website.
- You should be automatically logged in to your free membership.
- You should receive an email with your login details.
- If you check inside Infusionsoft, you should see the new contact with the correct membership tags and password.